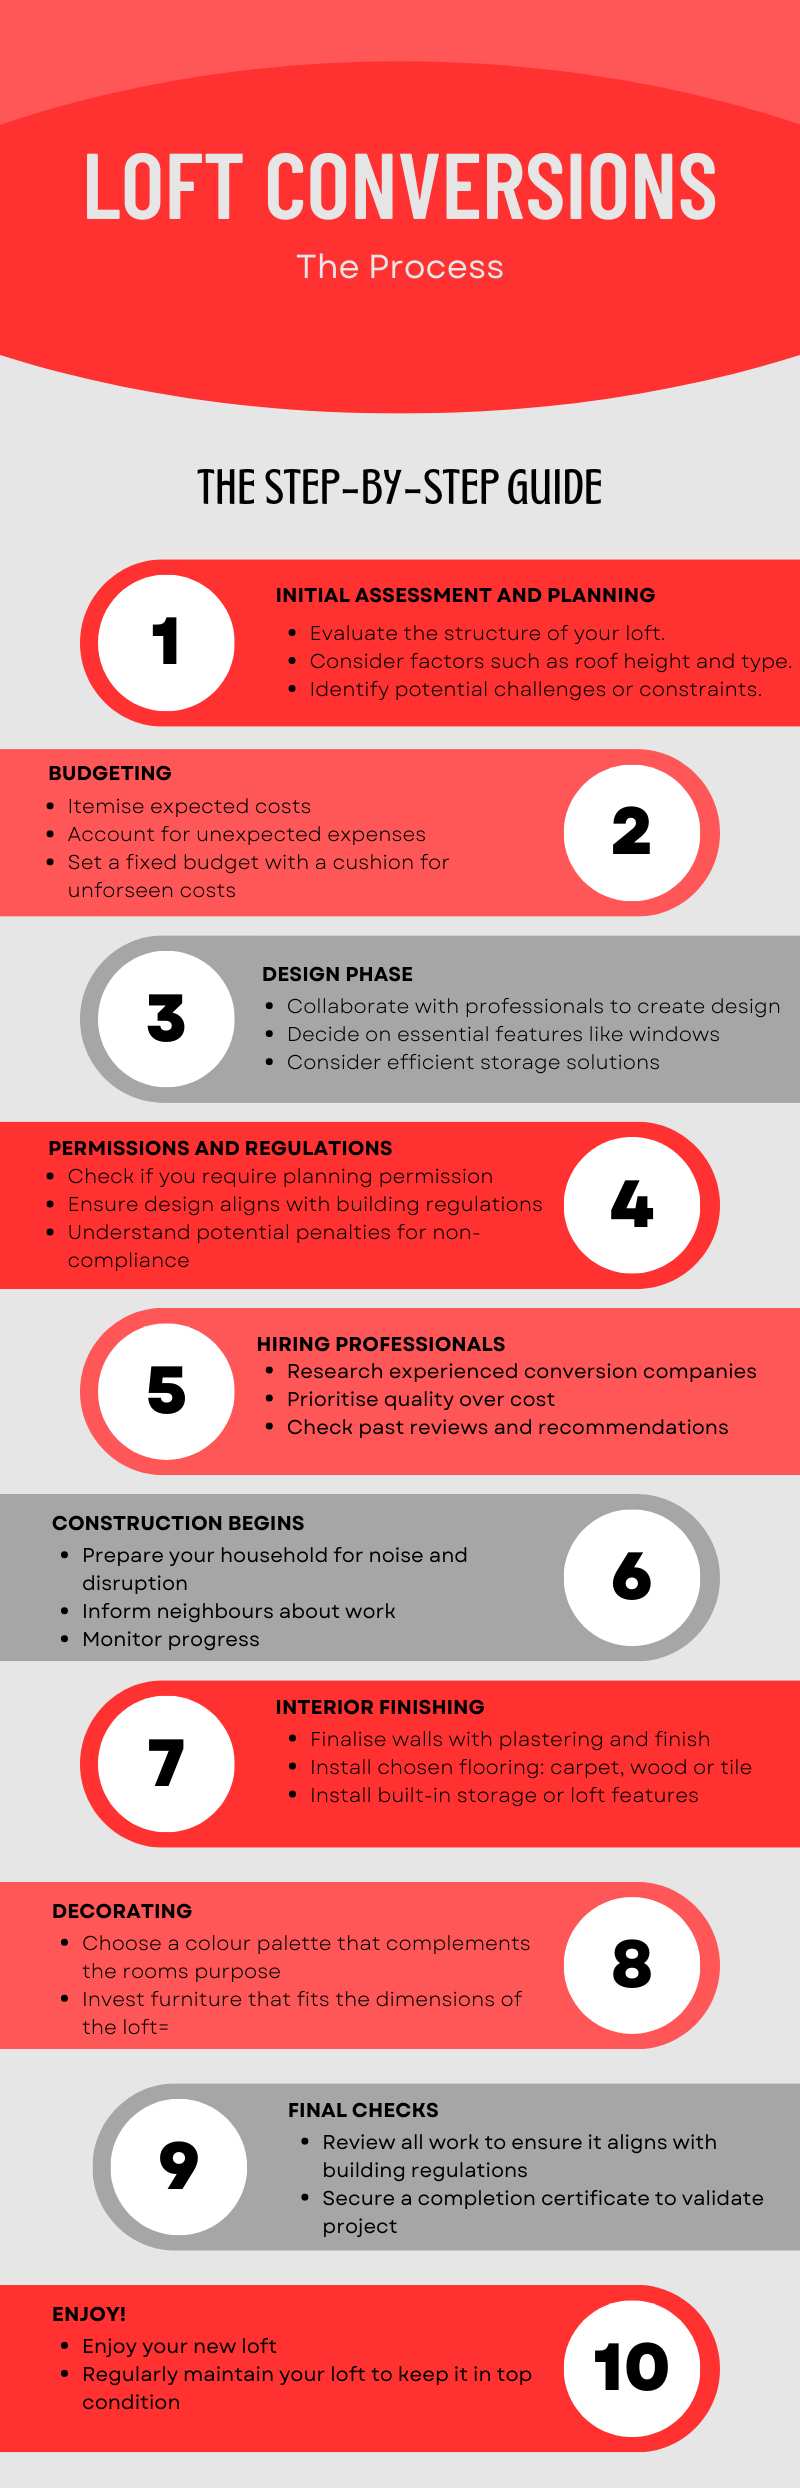
Loft conversions can transform any home, offering both a fresh look and functional space. Perhaps you’ve dreamt about that extra bedroom, a home office, or a playroom for the kids. Whatever your vision, turning it into reality requires careful planning and understanding of the process. In this guide, we’ll walk you through the step-by-step journey of a loft conversion.
1. Initial Assessment and Planning
Before starting, it’s essential to figure out if your loft is suitable for a conversion. Look at the available space, roof height, and the type of roof you have. Some homes might need minor adjustments, while others could require a more complex approach.
2. Budgeting
Money matters. Decide on a budget early on. Consider costs like materials, labour, and any unexpected issues that might arise. It’s a good idea to have a bit of extra cash set aside just in case.
3. Design Phase
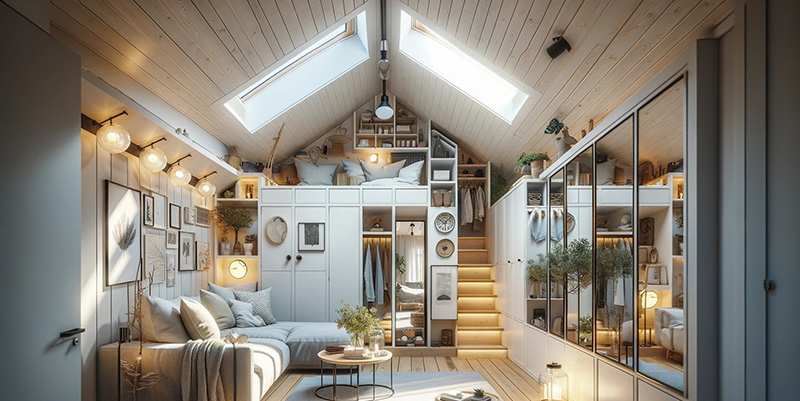
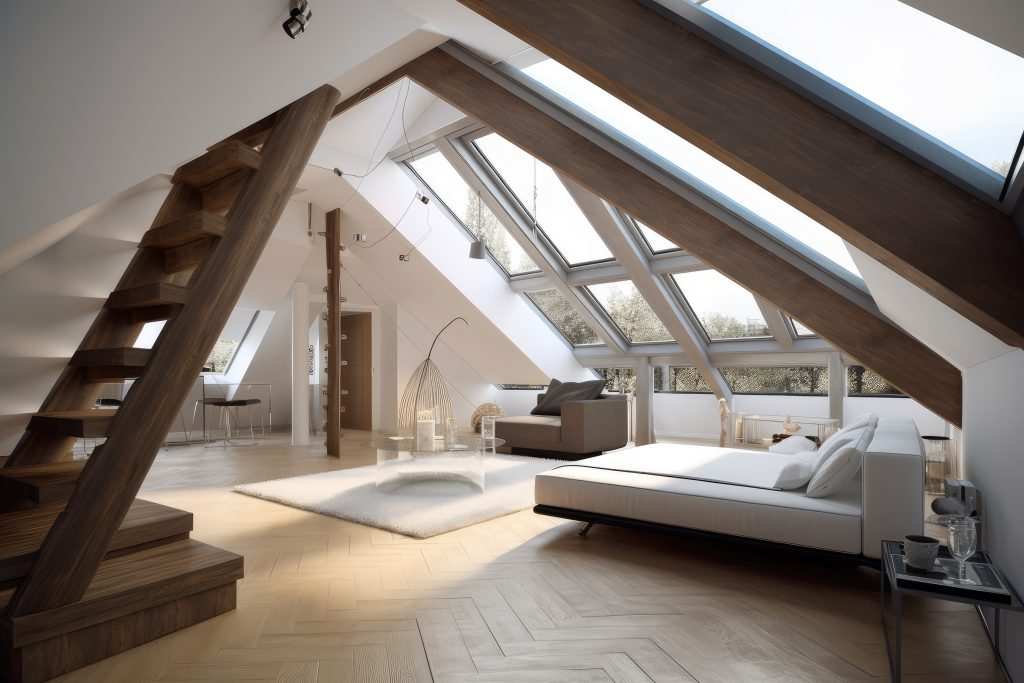
This is the fun part! With the help of an architect or designer, sketch out your dream space. Think about where you want windows, electrical outlets, and any other features. Don’t forget about storage solutions, which are vital in loft spaces.
4. Permissions and Regulations
In the UK, not all loft conversions require planning permission, but it’s always wise to check. You’ll also need to make sure your conversion meets building regulations. This ensures the safety and quality of your new space.
5. Hiring Professionals
Choose a builder or a loft conversion company with a good reputation. Ask friends for recommendations or look at reviews online. Remember, the cheapest option isn’t always the best. You want quality work that lasts.
6. Construction Begins
Once all the planning is out of the way, the actual work starts. This phase can be noisy and a bit disruptive, so prepare your household. Inform your neighbours as well, so they know what to expect.
During this phase:
- Structural Work: Your builders will strengthen the floor, make any required changes to the roof, and add in supports.
- Windows and Skylights: These are installed next to bring light into your new space.
- Insulation: A well-insulated loft helps keep the room warm in winter and cool in summer.
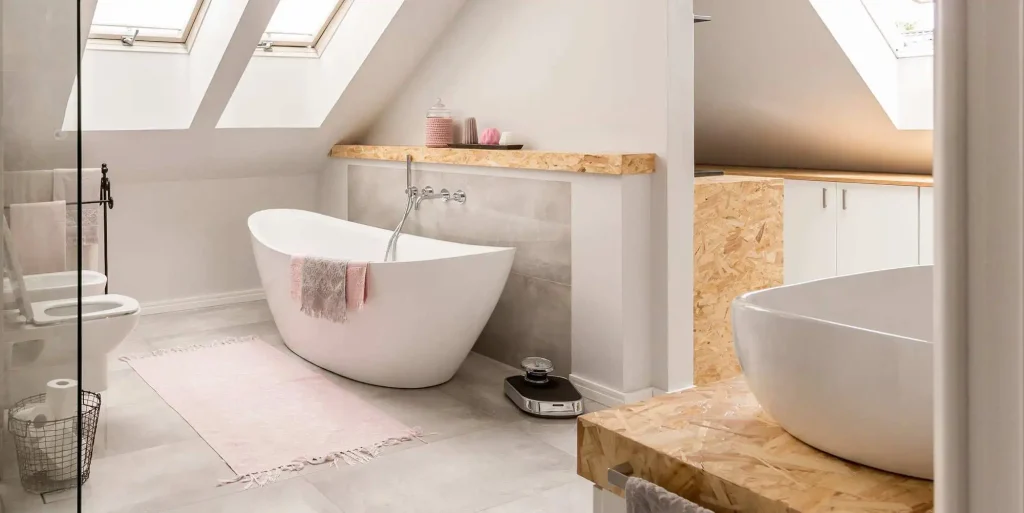
- Electrical and Plumbing: If your loft design includes a bathroom or needs electric outlets, this is when it’s set up.
7. Interior Finishing
Once the main construction is done, it’s time to move onto the interiors. This includes plastering walls, installing floors, and setting up any built-in storage.
8. Decorating
Now, you can truly make the space your own. Paint the walls, choose the flooring, and add personal touches with furniture and decorations.
9. Final Checks and Sign-Off
After all the work is complete, it’s essential to ensure everything is up to par. This involves checking that all work meets the building regulations. Once approved, you’ll get a completion certificate. Keep this safe – it’s important for when you might decide to sell your home.
10. Enjoy Your New Loft!
With everything finished, your dream space is now a reality. Whether it’s a cosy bedroom, a sleek office, or a play area for the children, take the time to enjoy it.
In conclusion, a loft conversion is an exciting journey that adds both value and function to your home. While it requires careful planning, the result is undoubtedly worth it. Follow this guide, take each step at your own pace, and soon enough, your vision will transform into a tangible, delightful reality.